Showing posts with label Home/decor. Show all posts

Monday, December 13, 2010

Woman Cave In Progress Brag plus need help about what to do on one wall.

My not very comfy sewing room and furniture and stuff catchall is what our upstairs hallway/living room used to be. This fall I began the work to convert it into my own hang out spot. Dispite that it has 6 door openings there is a nice sitting area down by the south facing double window.

Here is the only before I could find, with some of the paneling already down. You can see some old wallpaper under the plastic vapor barrier that my husband put up (yes he took the paneling down to do it) after blowing in insulation when he bought the house.

 
Posted by Picasa

 
This pretty wall paper was on the one wall that wasn't paneled. I love it and I enjoyed it for many years, but it was old and beat up, so it went with the rest of the wallpaper.


Here is a pic of the space in progress, with the plastic down.
 
Posted by Picasa


Hooray! The wallpaper is stripped off the walls and walls and ceiling are repaired and a layer of plaster applied. Walls painted a cool green. Here is my new chartreuse couch. My sewing machine plays double duty as a side table with a groovy lamp on it. I want to get a nice big piece of art work to hang over the couch.
 
My house doesn't have a fireplace (or mantel clearly) but this old dh family heirloom marble topped bureau which stores our bed linens can be my mantel I realized.
QUESTON ??? Should I put a mirror over it? The one that came with it I don't like. What about a big round one? Or something else?
 
I saved some of the green wallpaper which I have framed and plan to hang on the wall where it used to be.
 
So here is the sitting room end, by the window. Sorry it was hard to photograph due to the bright window. To take the photo I'm standing with the marble topped bureau on my right and my sewing cutting (or craft) table on my left.
I've had my neighbor women's group over. And I spend a lot of time there. I love it! Though I still have a way to go, decorating reupholstering the chairs you can't see.
 
Posted by Picasa

Posted by Picasa
I was inspired by a Jamie Drake room. I may give more details about that in future posts. The room is lighter and less earth tones that my dlowstairs living room.

Thanks for looking.
I'm hooking up to Bobbypin's Boardwalks Bragfest and Project Diaries at Stories of a House. Check out the other fun projects!

Kathy

The Boardwalk Bragfest

Photobucket

Monday, November 29, 2010

Lamp shade without spray adhesive .................... and a future project


Many people have posted about how to cover (plain white) lamp shades with fabric. And I thought I was going to follow their directions. I did roll the shade along a big piece of paper and trace it then cut out the fabric with enough margin to fold over top and bottom. But then I wanted to see how it looked so I thought I would just pin the back seam with a straight pin.

It took 3 tries to get the fabric even on the shade. And I was thinking, I am going to make a real mess trying to get the fabric on straight once I spray adhesive on the shade. I liked the look. A bit later I wondered what dh did with the spray adhesive so I could finish. But you know what? I decided to just fold over the top and bottom and glue right then and there. No spray adhesive on the body of the shade.

Skip this paragraph if you don't want details!: First I trimmed the seam at the top and bottom to be even. Then I turned over a little edge then folded down so I would have a finished edge and no threads. Held it together with clothes pins along the way. It took several steps as I waited for previous clothes-pinned parts to dry. Also I left a few inches the seam ends that were on top loose until I was ready to deal with the seam down the back. Finally I turned the long edge under and glued the back seam. Then I could do the last several inches of top and bottom. I held the middle of the seam with a straight pin and clothes pins at the top and bottom. (If you hot glue, don't pin, it probably wouldn't come out.) Do other people skip the spray adhesive? (I guess you could skip the pattern with adhesive, but I probably wouldn't want to do that.)

The bummer part is I (luckily) bought a whole yard of this fabric (54 inches wide) thinking I would do something else with what is left. The cuts were both through the line in the pattern that had birds! So I basically cut my shade out of the middle to get one of the birds on it.

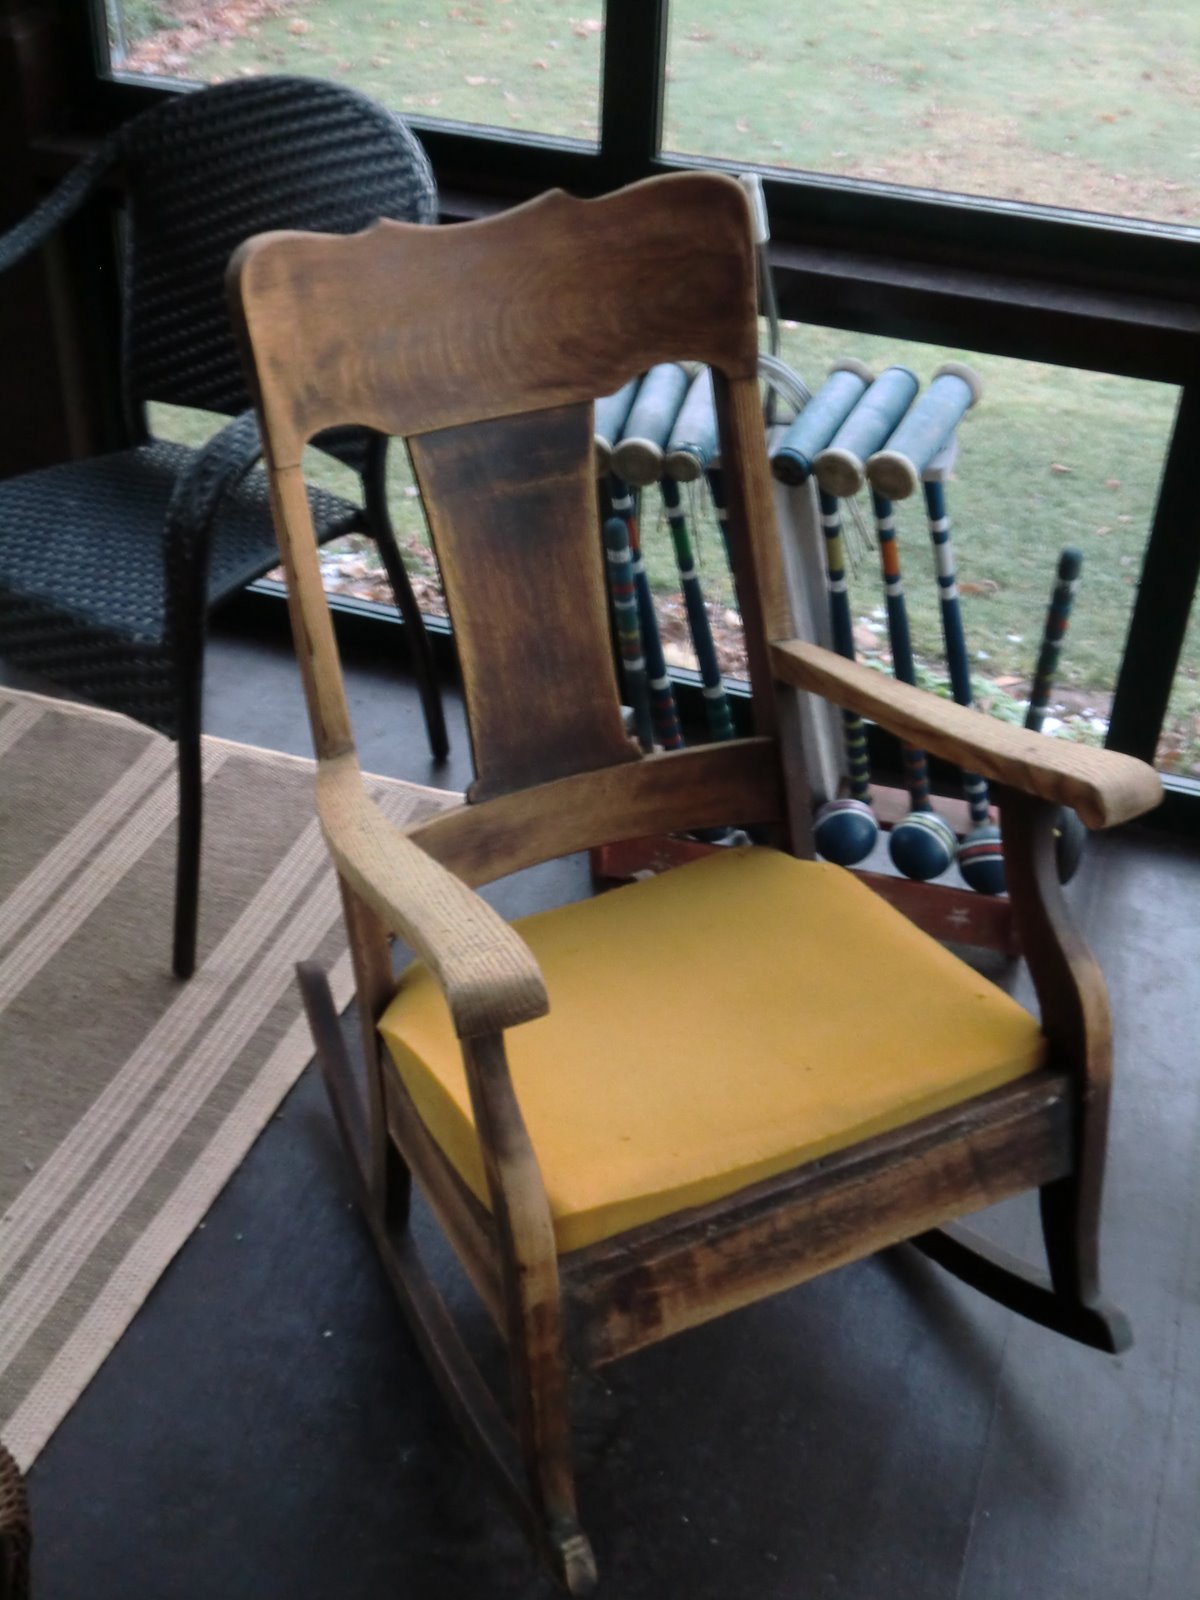
Below is my grandpa's old rocker which I got from my mom's cellar yesterday. I've just done a preliminary cleaning. I'm planning to fix it up for my new woman cave. Any suggestions? I'd love to see pics of what other people have done with similar chairs. The lamp is also for/in my new room. I've not posted a lot lately because I have a lot of non showy projects going on that must be done to complete that room. I'm shooting for it to be presentable, though not done (I want to reupholster a recliner, that won't even be started), by December 7. (You can see my pale green walls, and my recliner with a drop cloth thrown on it in the lamp pic.)

 
Posted by Picasa

Thanks for looking.

I'm linking up to Lit and Laundry's Finished for Friday. Check out the other projects!

Kathy

Thursday, October 7, 2010

Old wallpaper had to go!

I've been saving money for quite a while to fix up my "upstairs living room" which is a kind of swollen hallway that the bedrooms and bathroom open into - SIX doors counting the stairway door. It does have a nice double window and room for a seating area at one end. And we're also renovating one of the front bedrooms which had yucky paneling on the two outside walls. We took the paneling down this past winter when we augmented the old blown in insulation, so that got me planning. The picture below is what was on the one unpaneled wall in the living room. I have no idea how old it is, probably the same age as the paneling. I kind of liked it, except that it was old and dirty. I saved a piece to frame and hang in the room if I want to later.
 

Here are more views of that room and the wallpaper. Dd and I tried to get if off with fabric softener this spring but it took forever and was very hard. So a few weeks ago a friend and I rented a steamer - and even then it took 2 days to do the rooms.


Posted by Picasa

Here are a couple of pics of the walls in the front room. They had an interesting brown on cream botanical paper at one time. Most of it had paint on it too. Then underneath everything in both rooms was a gold paper that was often very hard to remove, though in a very few places on the green wallpapered wall it came off with all the other layers at once, easy peasy.


Posted by Picasa

I don't know why I find the old paper so interesting. Its history I guess.

The old walls in this 1920s home were in rough shape underneath, so dh insisted that we put a kind of thin fiberglass stuff that goes up like wall paper. I've been doing unskilled labor on the project before and after work, like pull out hundreds of nails from the paneling and daily clean up. I'm going to paint the rooms when ready, buy a new couch (I've picked it out: its chartreuse), make curtains, paint some of the existing furniture and keep dh, who thinks i'm out of my mind, at bay. Oh and another friend has offered me a cute little love seat which is a similar style to the new couch, but I'll need to slip cover or reupholster it.

Other than that I've been repairing wallpaper and baseboard in another bedroom where we hadn't gotten around to filling the little holes left in the aftermath of the blown in insulation. (We had to make holes from the interior since we have aluminium siding.) And putting cork on the closet walls in that room, don't ask me why - long story. Its all taken a lot longer than I thought! And I've made some new plate flowers but they aren't in the garden yet. Nothing much to show yet! But soon...

Kathy

Wednesday, July 14, 2010

Finally have a screen porch!

Last night I had some women from the neighborhood over to hang out on my new porch! And I'm sitting there now to write this post. Check out other projects at Bobbypins Boardwalk's Bragfest!

Two years ago our back porch was listing and we knew we had to have it repaired. The 1920s vintage footings for the porches were concrete poured in nail buckets. In the process we decided that we should screen the porch in and make it look similar to the upstairs screened in sleeping porch. Finally the screening was completed on Monday! The reason it took so long, is that my dh wanted to do all painting and repairing before the screens were up. I'm so pleased. Our house is not beautiful, but it is a nice practical comfortable home. The trim is white (and peeling) in this pic - not sure where the yellowy green came from! And we did have lattice on the bottom, its been torn off in the pic in prep for the digging.

BEFORE:
Back porch before

AFTER:
We also replaced the skinny corner boards with wide ones all over the house at the same time. The porch faces east and the siding is a bit washed out looking cuz of the morning sun. We used Screeneze system (downstairs, upstairs is traditional screening.)
Photobucket

Photobucket

We have these engineered wood steps that are nice to sit on and a stone patio so that we still have outdoor living space. I was skeptical about the faux wood, but the steps are not slippery in winter like real wood steps.
Photobucket

Thanks for looking. I'm sitting here drinking coffee with the kitties. They are slowly learning to use the kitty door in the screen to left of the people door.

Kathy