Monday, December 13, 2010

Woman Cave In Progress Brag plus need help about what to do on one wall.

My not very comfy sewing room and furniture and stuff catchall is what our upstairs hallway/living room used to be. This fall I began the work to convert it into my own hang out spot. Dispite that it has 6 door openings there is a nice sitting area down by the south facing double window.

Here is the only before I could find, with some of the paneling already down. You can see some old wallpaper under the plastic vapor barrier that my husband put up (yes he took the paneling down to do it) after blowing in insulation when he bought the house.

 
Posted by Picasa

 
This pretty wall paper was on the one wall that wasn't paneled. I love it and I enjoyed it for many years, but it was old and beat up, so it went with the rest of the wallpaper.


Here is a pic of the space in progress, with the plastic down.
 
Posted by Picasa


Hooray! The wallpaper is stripped off the walls and walls and ceiling are repaired and a layer of plaster applied. Walls painted a cool green. Here is my new chartreuse couch. My sewing machine plays double duty as a side table with a groovy lamp on it. I want to get a nice big piece of art work to hang over the couch.
 
My house doesn't have a fireplace (or mantel clearly) but this old dh family heirloom marble topped bureau which stores our bed linens can be my mantel I realized.
QUESTON ??? Should I put a mirror over it? The one that came with it I don't like. What about a big round one? Or something else?
 
I saved some of the green wallpaper which I have framed and plan to hang on the wall where it used to be.
 
So here is the sitting room end, by the window. Sorry it was hard to photograph due to the bright window. To take the photo I'm standing with the marble topped bureau on my right and my sewing cutting (or craft) table on my left.
I've had my neighbor women's group over. And I spend a lot of time there. I love it! Though I still have a way to go, decorating reupholstering the chairs you can't see.
 
Posted by Picasa

Posted by Picasa
I was inspired by a Jamie Drake room. I may give more details about that in future posts. The room is lighter and less earth tones that my dlowstairs living room.

Thanks for looking.
I'm hooking up to Bobbypin's Boardwalks Bragfest and Project Diaries at Stories of a House. Check out the other fun projects!

Kathy

The Boardwalk Bragfest

Photobucket

Thursday, December 9, 2010

Christmas birds and woman cave preview

I have wanted some of those old candy holder birds. The "cheap" cardboard ones from Japan in the fifties.

 
Posted by Picasa

The head comes off and you put candy inside if you want.


Here are a bunch sitting in a nest of old plastic foliage pics and a star garland I just got from my mom. Along with a preview of my new woman cave chartreuse couch. I'm going to post about my new sitting room next week.


For some reason Mom cut some of the leaves off the mistletoe, but she saved them. Thanks Mom!


I really like that the birds are so determined looking, plus glittery.


Its a lucky thing that I like them so much because I got these on Ebay. In the heat of the last moments of the auction, I entered four digits and forgot the decimal point. Needless to say, I won. I'm fortunate that the other bidder wasn't completely wacko, and hadn't made the same mistake!

Posted by Picasa


I got this cute sleigh at a thrift store. Its nice as is, but not the right colors for my new room.
 
The birdies do look cute in it. I couldn't find my doll that I wanted to drive it. But I might before Christmas.
 
I'm linking up to Colorado Lady's Vintage Thingies Thursday and the party at Very Merry Vintage Style. Check out the other cool vintage Christmas ideas!

Posted by Picasa

Monday, November 29, 2010

Lamp shade without spray adhesive .................... and a future project


Many people have posted about how to cover (plain white) lamp shades with fabric. And I thought I was going to follow their directions. I did roll the shade along a big piece of paper and trace it then cut out the fabric with enough margin to fold over top and bottom. But then I wanted to see how it looked so I thought I would just pin the back seam with a straight pin.

It took 3 tries to get the fabric even on the shade. And I was thinking, I am going to make a real mess trying to get the fabric on straight once I spray adhesive on the shade. I liked the look. A bit later I wondered what dh did with the spray adhesive so I could finish. But you know what? I decided to just fold over the top and bottom and glue right then and there. No spray adhesive on the body of the shade.

Skip this paragraph if you don't want details!: First I trimmed the seam at the top and bottom to be even. Then I turned over a little edge then folded down so I would have a finished edge and no threads. Held it together with clothes pins along the way. It took several steps as I waited for previous clothes-pinned parts to dry. Also I left a few inches the seam ends that were on top loose until I was ready to deal with the seam down the back. Finally I turned the long edge under and glued the back seam. Then I could do the last several inches of top and bottom. I held the middle of the seam with a straight pin and clothes pins at the top and bottom. (If you hot glue, don't pin, it probably wouldn't come out.) Do other people skip the spray adhesive? (I guess you could skip the pattern with adhesive, but I probably wouldn't want to do that.)

The bummer part is I (luckily) bought a whole yard of this fabric (54 inches wide) thinking I would do something else with what is left. The cuts were both through the line in the pattern that had birds! So I basically cut my shade out of the middle to get one of the birds on it.

Below is my grandpa's old rocker which I got from my mom's cellar yesterday. I've just done a preliminary cleaning. I'm planning to fix it up for my new woman cave. Any suggestions? I'd love to see pics of what other people have done with similar chairs. The lamp is also for/in my new room. I've not posted a lot lately because I have a lot of non showy projects going on that must be done to complete that room. I'm shooting for it to be presentable, though not done (I want to reupholster a recliner, that won't even be started), by December 7. (You can see my pale green walls, and my recliner with a drop cloth thrown on it in the lamp pic.)

 
Posted by Picasa

Thanks for looking.

I'm linking up to Lit and Laundry's Finished for Friday. Check out the other projects!

Kathy

Tuesday, November 9, 2010

Silk purse from a sow's ear, sort of.

I love these cheapo "silk" leaves from the dollar store. I had a spray of them left over from my halloween porch flower project last year (see post here if you want). I've been thinking the leaf fabric must be good for something.

 
Posted by Picasa


Notice that I have carefully torn two of the leaves off the stems so that I just have the material. (You see the plastic veins left behind.) Then I went to the box of used metal zippers that I inherited from my frugal Memere and picked out a shortish black one so I could make myself a leaf change purse. I had to trim the leaves to be the same shape, since they are identical and I needed mirror images. First sew on the zipper:
(Hint: bend the zipper to follow the shape of the leaf, don't try to straighten out the leaf edge!)


Then stitch up everywhere else. I did it all from the top (that is right side) because the edges of the leaves seem to be non-raveling. I should have kept my zipper foot on the machine because I didnt' get quite close enough to each end of the zipper and had to hand sew a bit...


Voila! A rather large change purse. But maybe I won't lose it like all my others.


I don't have a pic of this but since it is a cloth and metal zipper, the purse can be folded into quarters and stuffed into a small pouch in my pocketbook.

 
Posted by Picasa

I like it. What do you think?

Kathy

I'm linking to the party at Simpsonized Crafts - AND Whatever Wednesday at Someday Crafts -- check out the other projects!

Thursday, November 4, 2010

My stationery from Jr. High - the 60's!

This is my One Hundredth Post! And its been about a year.
Here is some stationery that I have left from Jr. High ahd younger when I used to write a lot of letters. I'm not much for anniversaries really, but I'll celebrate this one by looking back in time with Coloradolady at Vintage Thingys Thursday. Check out the other vintage delights too!
Thank you to all my followers and friends for spending the time with me in blogland this past year! Its been a lot of fun.


Posted by Picasa

Kathy

Wednesday, October 27, 2010

Fall Dance: Witch Hazel & Japanese Dogwood

I love our american native dogwood, Cornus florida, but it seldom blooms this far north. So many years ago I bought a Cornus kousa, a very similar more hardy Japanese dogwood. I imagined it blooming beautifully in the spring, the centerpiece of our little wild area in front of the stone wall. And in the fall, it would have lovely red foliage. Here are the red leaves. I'm linking to Rednesday: check out other red things at Rednesday at It's a Very Cherry World.
 
Years passed and nothing much happened. I forgot my vision. Then a few springs ago, I discovered the dogwood blooming. But dh had planted it in back of a native witch hazel accidentally and it was almost invisible in the treeline, hidden by the not very showy Hamemalis. I was very disappointed and we talked about cutting down the witch hazel.
 
See the witch hazel's little stringy yellow flowers? Its blooming now when almost all the leaves are gone, including its own. But the dogwood's red leaves are still there making a terrific backdrop.
 
I think I'll plant another dogwood somewhere else where it is more visible and leave this one to be a pleasant surprise in spring on our path by the stone wall and fall companion to the witch hazel.
 
Here is the view from my pantry window. Don't they look like they are dancing together?
 
Posted by Picasa

Thursday, October 7, 2010

Old wallpaper had to go!

I've been saving money for quite a while to fix up my "upstairs living room" which is a kind of swollen hallway that the bedrooms and bathroom open into - SIX doors counting the stairway door. It does have a nice double window and room for a seating area at one end. And we're also renovating one of the front bedrooms which had yucky paneling on the two outside walls. We took the paneling down this past winter when we augmented the old blown in insulation, so that got me planning. The picture below is what was on the one unpaneled wall in the living room. I have no idea how old it is, probably the same age as the paneling. I kind of liked it, except that it was old and dirty. I saved a piece to frame and hang in the room if I want to later.
 

Here are more views of that room and the wallpaper. Dd and I tried to get if off with fabric softener this spring but it took forever and was very hard. So a few weeks ago a friend and I rented a steamer - and even then it took 2 days to do the rooms.


Posted by Picasa

Here are a couple of pics of the walls in the front room. They had an interesting brown on cream botanical paper at one time. Most of it had paint on it too. Then underneath everything in both rooms was a gold paper that was often very hard to remove, though in a very few places on the green wallpapered wall it came off with all the other layers at once, easy peasy.


Posted by Picasa

I don't know why I find the old paper so interesting. Its history I guess.
The old walls in this 1920s home were in rough shape underneath, so dh insisted that we put a kind of thin fiberglass stuff that goes up like wall paper. I've been doing unskilled labor on the project before and after work, like pull out hundreds of nails from the paneling and daily clean up. I'm going to paint the rooms when ready, buy a new couch (I've picked it out: its chartreuse), make curtains, paint some of the existing furniture and keep dh, who thinks i'm out of my mind, at bay. Oh and another friend has offered me a cute little love seat which is a similar style to the new couch, but I'll need to slip cover or reupholster it.

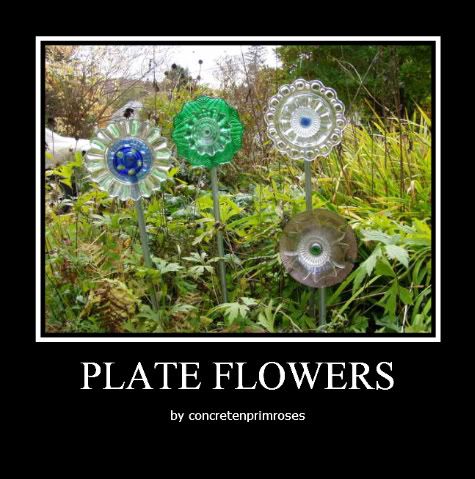
Other than that I've been repairing wallpaper and baseboard in another bedroom where we hadn't gotten around to filling the little holes left in the aftermath of the blown in insulation. (We had to make holes from the interior since we have aluminium siding.) And putting cork on the closet walls in that room, don't ask me why - long story. Its all taken a lot longer than I thought! And I've made some new plate flowers but they aren't in the garden yet. Nothing much to show yet! But soon...

Kathy