Friday, September 6, 2013

Office Chair Makeover

We bought our foster daughter this chair 20 years ago from a used office furniture warehouse.  She was into rose colors at the time.  20 years later it is very beat up and the picture doesn't really show how awful.  The almond colored plastic base is all yellowed and cracked and gross.

CIMG3115

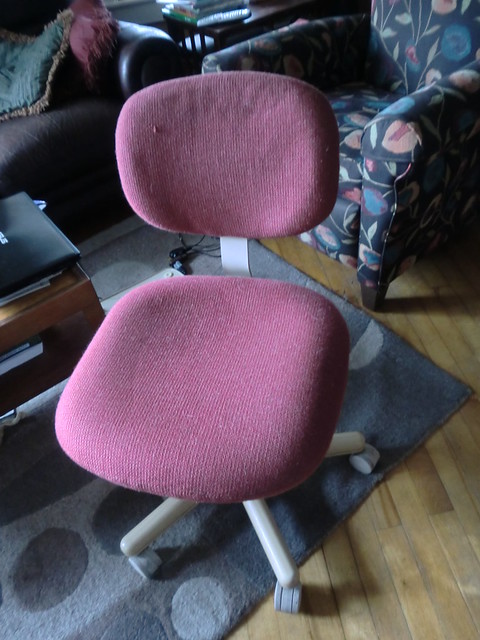
Its been in my study looking terrible.  I want some practice with reupholstering before I tackle big projects so I decided to remake this chair on Labor Day afternoon.  My rule was that I couldn't buy anything but had to use what I have on hand.  (I have too much stuff, gotta use it up!)

So I took it apart and spray painted the plastic and metal pieces.

The back of the back rest really does pop off!

Lots of screws to remove everywhere else.
I decided to to use a brown-bronzy textured paint on the plastic base and metal piece that connects the back of the chair to the seat; and brown spray paint on the plastic piece on the back of the back rest (what do you call those things).

I painted the plastic parts with rust-oleum for Plastic spray paint in dark green first, hoping that would help the bronzy stuff stick since it is technically for metal.

CIMG3116

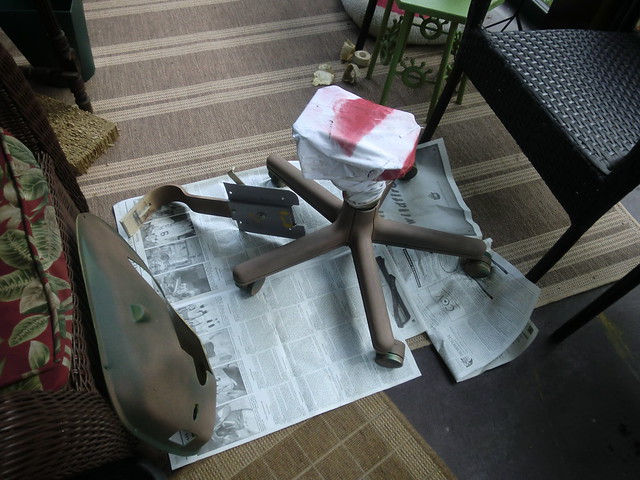
I realized too late I didn't need to waste any of the bronzy paint on that big plastic piece from under the seat because it doesn't show.  Oh well.

Here is the plastic back of the back piece in progress.

CIMG3117

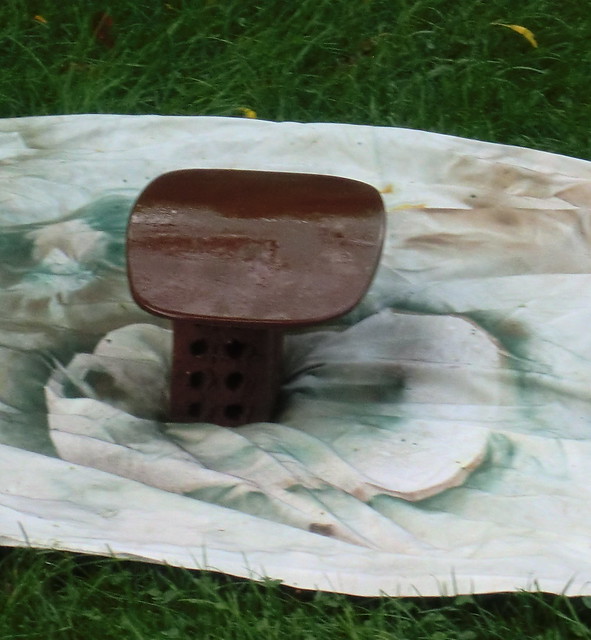
The dark brown was almost empty and it is water based.  We'll see how it goes over time.

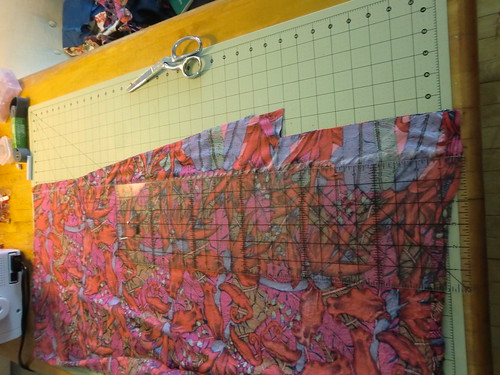
While the paint was drying I stapled fabric onto the seat and back piece.  Hint: use long staples in your staple gun.  I had to hammer then in sometimes too.  I also wish I'd taken a few pictures before I took the chair apart because I got a few staples out of the area covered by the back cover.  They tend to blend in with the fabric fortunately.  And the corners are not perfect partly because the fabric is totally not stretchy.

I used some upholstery fabric that I had bought a couple years ago for a different project then changed my mind.

Putting it back together was a bit of a challenge.  Again pictures or even a note or two would have helped, but I did it with Iggy's help!

CIMG3118

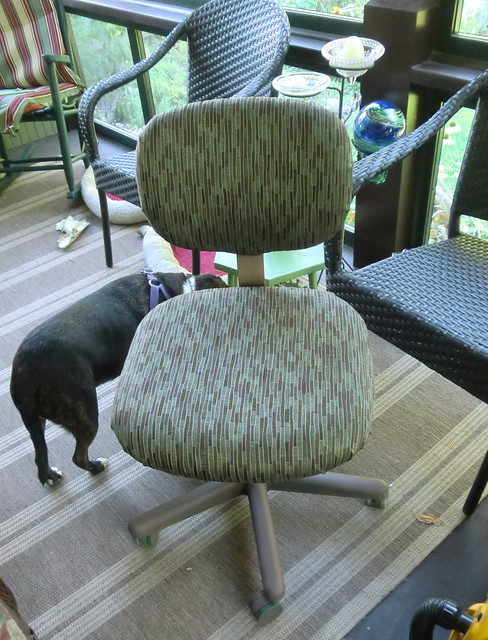
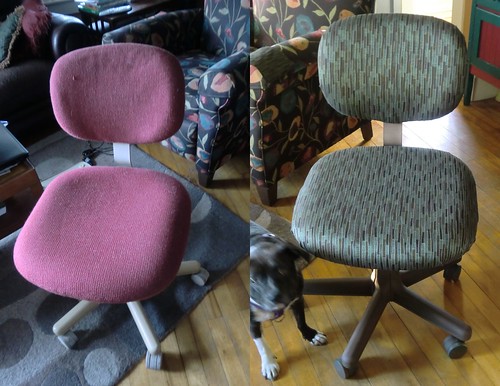
I'm happy with it.   What do you think?  Here is the before and after together for comparison.

KAP's Photos

I'm linking up to Whatever Goes Wednesday at Someday Crafts. Also Thrifty Things Friday at The Thrifty Groove.   Check out the other great projects there!

On the next thing!

Kathy

Saturday, July 20, 2013

Three dress to skirt refashions, 1 failure, 2 okay

I got two almost identical XL dresses in India print at a TS for a couple of bucks each, thinking they would fit my foster daughter.  They did fit but were not flattering.  So I decided to try to make something for me.  I only took a before pic of this one, but there is also a red print which is the second refashion in the post.

Dress plus pants

Another sewist who posted at the Refashion Coop had added a skirt to a pants waistband and top so I thought I would try that with the top of these old linen pants which have never fit me well.

Dress plus pants

So I cut the skirt off the dress at the gathers and attached it to the pants top.  

Dress plus pants

Then....  disappointment!  What was I thinking.  I have no idea what to do with these now.  About all I can say for this skirt is that it fits.  Too much pant part and too much gathers, I think.  The trouble is the pockets of the pants go low.  I may try to redo this (later, much later).

Dress plus pants

Ok the red dress is next.  I had seen a cute skirt in Anthro with a similar print and a dropped waist.  So this time I cut the skirt off above the gathers, just below the armholes to leave room for a casing and have the gathers drop to the hips.

Refashion dress

And put some nicer buttons (that I got at the same TS, later) to replace the plastic wood look standard cheapo ones that the dress came with.  There weren't enough of one style so I used two cute small ones at the top and the larger ones you see for the rest.

Refashion Dress

Turned under to make a waistband and put elastic in elastic.  I sewed up the button up front, tho I kept the look of it.   I think its ok.  Not sure I like how I styled it in this photo, but you get the idea.

Refashion dress

I wish I had made it a bit longer.  Still could I guess!

Finally, I found a wild colorful too large print dress at a TS.  It was a sleeveless pull on.   I cut it off under the arms, took in the sides (with my new serger - love it so much),  saved some fabric when I took in the sides at the bottoms for the side vents.

Measuring the side vent

I like it, and its a nice length.

Long skirt made from dress

So I'm not really thrilled with even the 2nd two which I have worn and will wear again.  Even so, one of the wonderful things about refashioning is that I am improving my sewing skills and trying styles without spending much money.

I'm linking up to Motivate Me Monday at Keeping It Simple and What to Do Weekends at Crafts a la Mode. and Refashion First Friday.  Check out the amazing other projects!

Thanks for looking.

Kathy