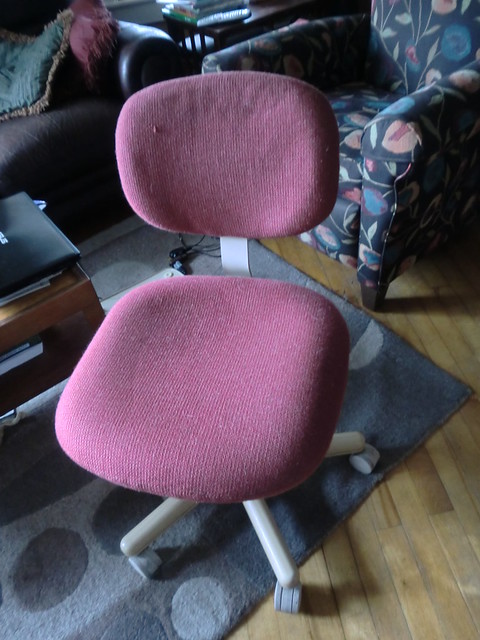
Its been in my study looking terrible. I want some practice with reupholstering before I tackle big projects so I decided to remake this chair on Labor Day afternoon. My rule was that I couldn't buy anything but had to use what I have on hand. (I have too much stuff, gotta use it up!)
So I took it apart and spray painted the plastic and metal pieces.
The back of the back rest really does pop off!
Lots of screws to remove everywhere else.
I decided to to use a brown-bronzy textured paint on the plastic base and metal piece that connects the back of the chair to the seat; and brown spray paint on the plastic piece on the back of the back rest (what do you call those things).
I painted the plastic parts with rust-oleum for Plastic spray paint in dark green first, hoping that would help the bronzy stuff stick since it is technically for metal.
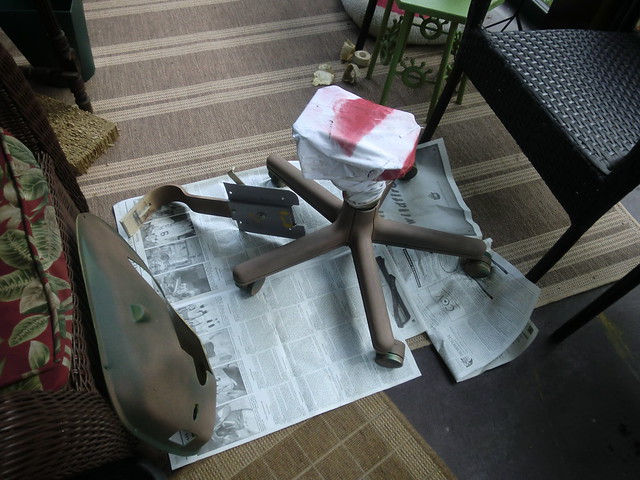
I realized too late I didn't need to waste any of the bronzy paint on that big plastic piece from under the seat because it doesn't show. Oh well.
Here is the plastic back of the back piece in progress.
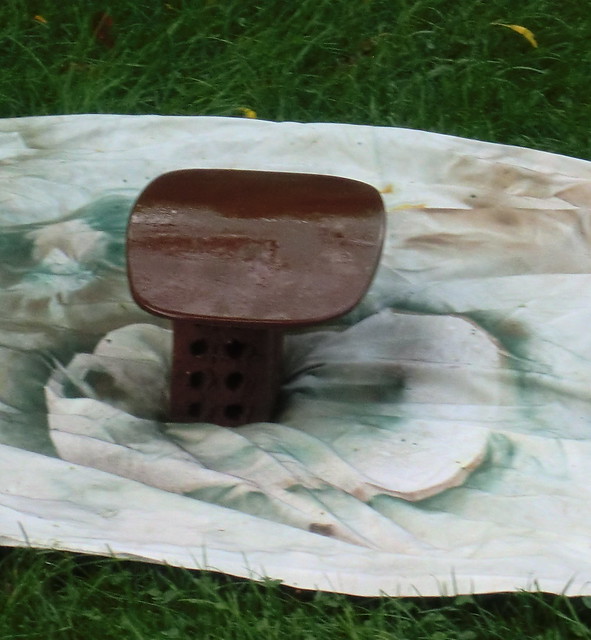
The dark brown was almost empty and it is water based. We'll see how it goes over time.
While the paint was drying I stapled fabric onto the seat and back piece. Hint: use long staples in your staple gun. I had to hammer then in sometimes too. I also wish I'd taken a few pictures before I took the chair apart because I got a few staples out of the area covered by the back cover. They tend to blend in with the fabric fortunately. And the corners are not perfect partly because the fabric is totally not stretchy.
I used some upholstery fabric that I had bought a couple years ago for a different project then changed my mind.
Putting it back together was a bit of a challenge. Again pictures or even a note or two would have helped, but I did it with Iggy's help!
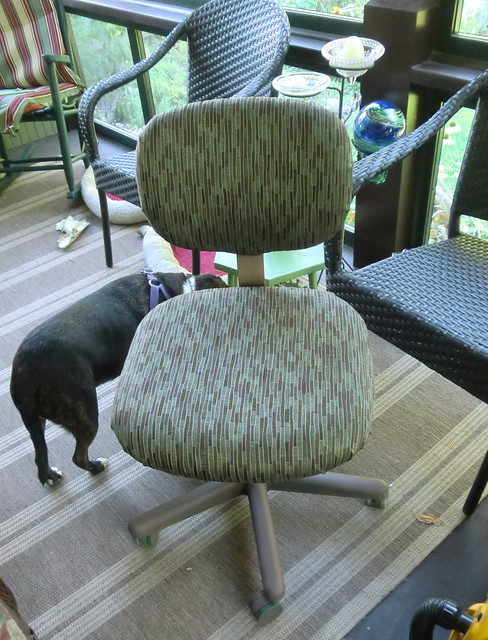
I'm happy with it. What do you think? Here is the before and after together for comparison.
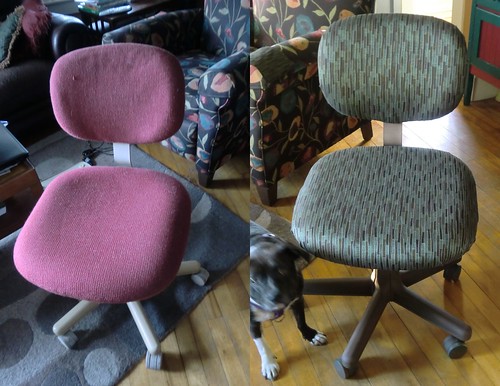
I'm linking up to Whatever Goes Wednesday at Someday Crafts. Also Thrifty Things Friday at The Thrifty Groove. Check out the other great projects there!
On the next thing!
Kathy



I love how your chair project turned out! It looks great. I recovered an office chair last year to use in my classroom. Mine went from grey to black and white chevron. Off to check out some more of your posts!
ReplyDeleteBlessings, Vicky
Life On Willie Mae Lane
What a difference !!! It looks much better noe and the color is better.
ReplyDeletenice idea! customizing furniture is great~
ReplyDeleteweirdoland - www.pigeongray.blogspot.com
To me, chairs like these are really expensive. So glad I stumbled upon this blog as I also have a similar chair that has gotten just dirty with years of use, but which i don't want to just replace because it's still purposeful and functional. Will definitely try this project for the same chair
ReplyDeleteHello my friend! I wish to say that this article is amazing, nice written and include almost all important infos. I would like to see more posts like this .
ReplyDeleteCardsharing Server
I experience like I have been there myself. I really like this weblog - keep up the excellent work!
ReplyDeleteOffice Desk
Reception Desk
I like your blog.Thanks for share with your ideas.your chairs looking great.
ReplyDeleteBürostühle - Büromöbel Ausstellung