Monday, September 26, 2016

Air Dry Clay reviews: DAS and Activa Plus Part 1 of 2

I bought both of these in 2.2 lb blocks after reading reviews and looking at what other crafts people recommended.  Disclaimer:  This is not a scientific study!  I didn't do the exact same thing with both clays, though close.

First I used the DAS, and I had a bowl of water with me to keep the clay moist.  I had read complaints that it was chunky and dry but that wasn't my experience. I did keep the clay covered and dampened it with water while i worked with it.  Then I put wax paper over it as it dried.   20 hours later, I could bend them slightly but they didn't take impressions anymore.  Its lucky they were still pliable because I realized I might want to add some beads to the bottom of a few of them so I made some holes with an small awl.  Three days after first making them they are hard and white, see below.  I didn't notice any shrinking.

DAS 3 days after making


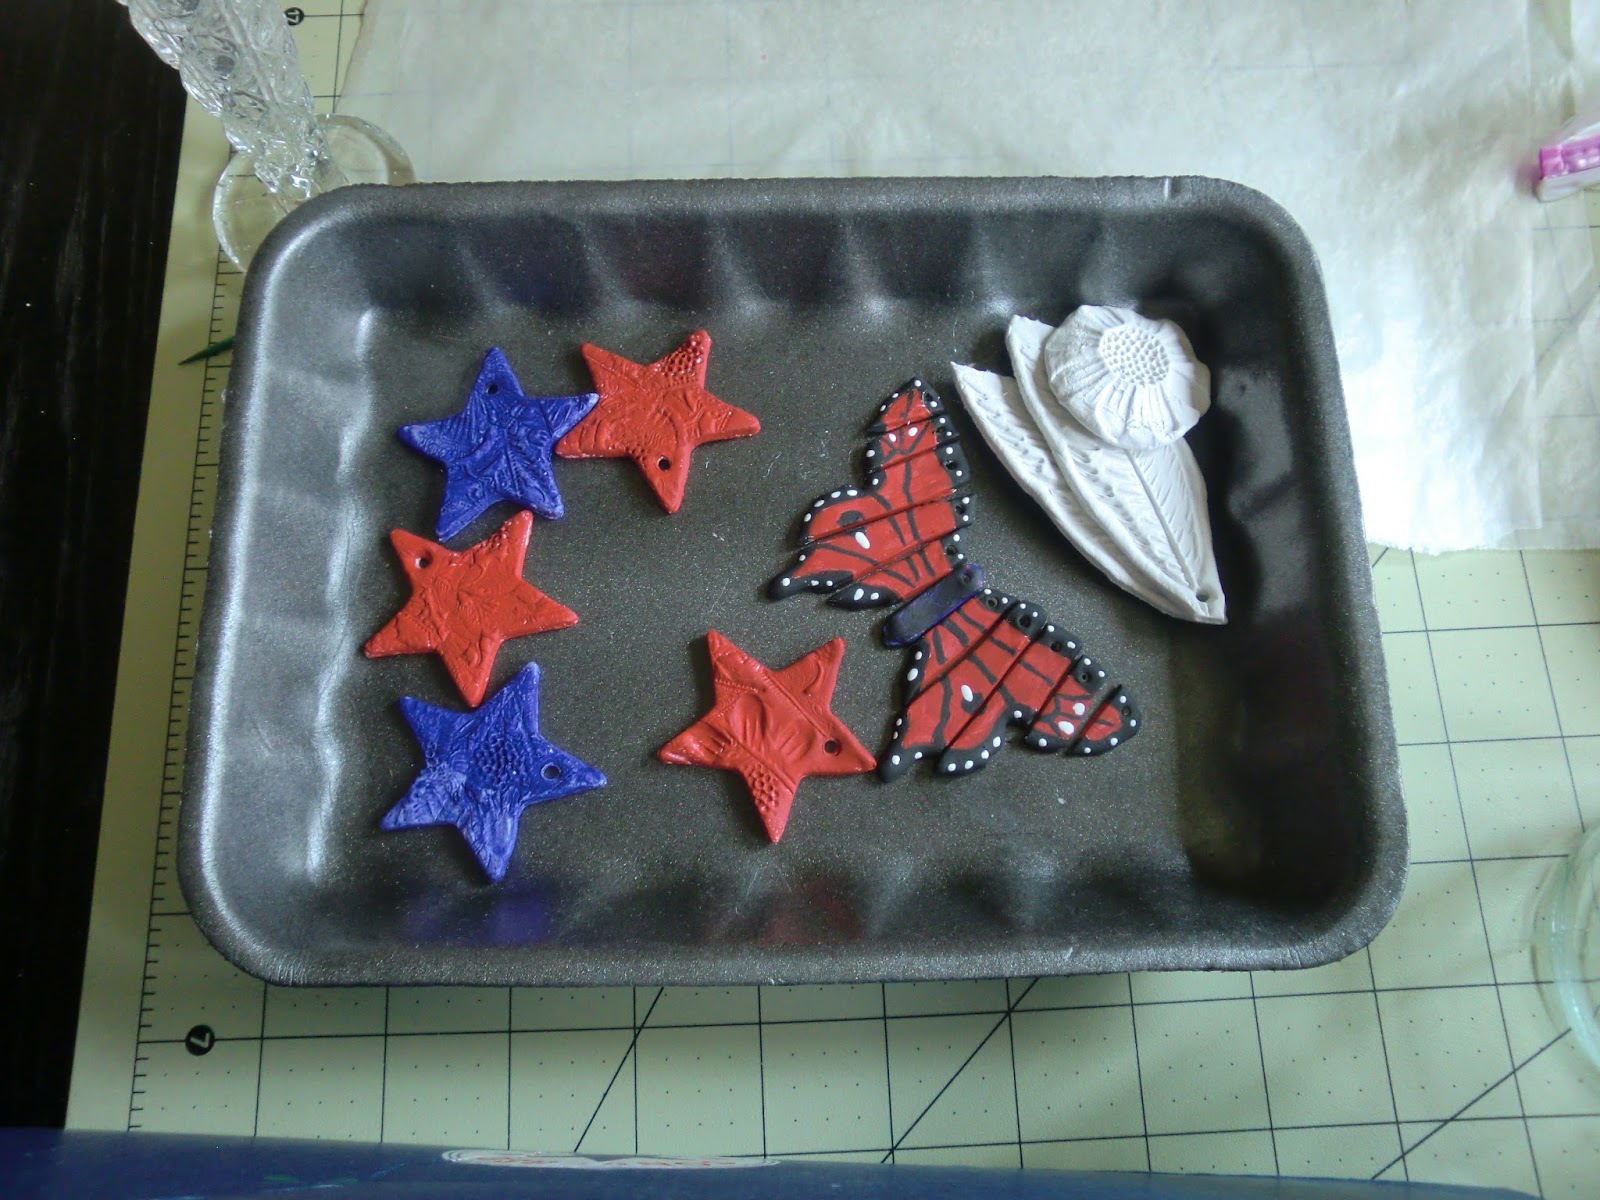
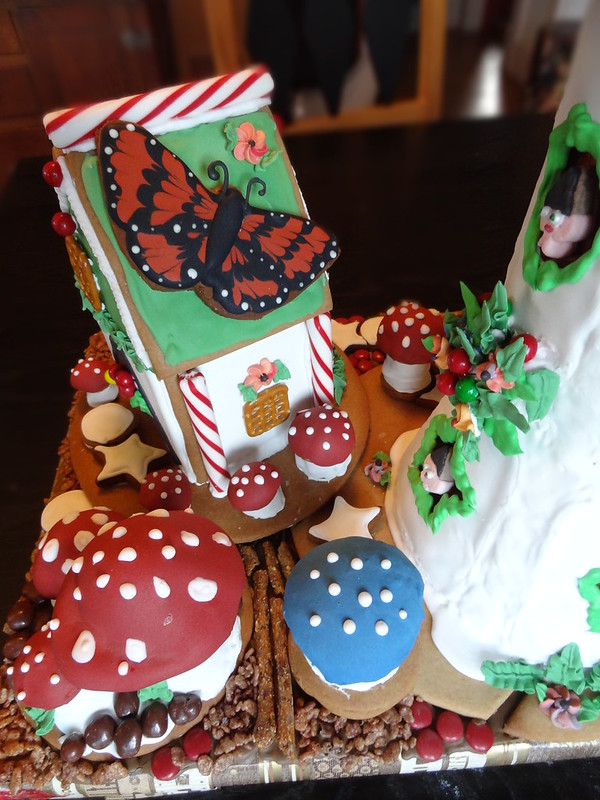
Then the Activa Plus. I found this clay a little harder to work with, but easier to smooth.  If felt wetter than the Das, but seemed to dry quicker.  Again I put wax paper over the top so they wouldn't dry too quickly, especially the big mushroom which my dfd made.  I fiddled with the butterfly so long that I forgot to make a piece with impressions, so I'll do that later.  The next morning the small pieces that are the tips of the wings had curled up slightly and I cracked one trying to flatten it.  But I brushed on water on both and they seem to be ok.  There was significant shrinkage which I could see because the wax paper had crinkled up around the pieces as they dried and pulled the paper.  The shrinkage hasn't affected these pieces yet, and I'm hopeful that they will be ok.  I am still covering the big mushroom now (2 days later) because I'm afraid it will crack and want to slow down the drying process.  Picture below - two days after making. (I pushed the butterfly pieces back together now that they are somewhat dry. The cap of my mushroom is a separate piece.)

ACTIVA PLUS 2 days after making:


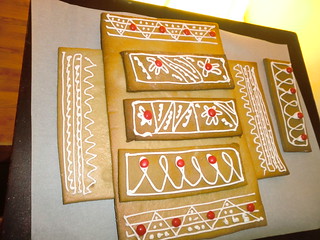
Quite a few days later I remembered to roll out some Activa to make a stamped piece.  By this time I knew it would shrink a lot, but this shows it pretty dramatically.  (Activa on left, DAS on right)  Same stamp used on both shows the shrinkage of the Activa.  It also didn't take the impression as well.

 Gnome house on a jar

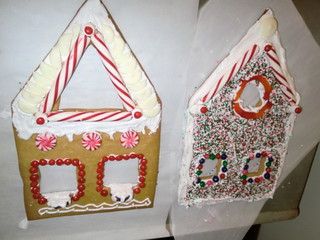
I thought this would be a great test of the clays.   First I used the Activa but it cracked as it shrank.  (Even though I hadn't done the above primrose stamp, I should have known, right?... based on the butterfly)  I'm not sure this is a problem as I can put vines and flowers on top of the cracks, as long as the clay doesn't fall off, we'll see.  I put the cover/roof on for these pictures but I'm drying them separately.

Activa Plus gnome house, stage 1 after about 20 hours.  Cracks on the jar part, btw roof has tinfoil armature:


Then the DAS on a jar on the right.  I didn't want to make the exact same thing.  No problem with cracking.  Unfortunately I didn't take a picture of the top of the DAS one until it was all painted.
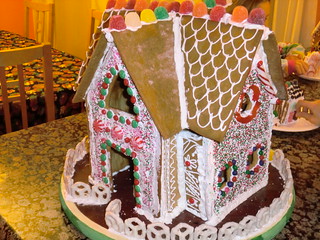
 Here you can see the Activa mushroom top all cracked, below.  And above left, the side of the door has fallen off.  I panicked and decided to fill all of the cracks with hot glue, which was a big mistake because hot glue doesn't take paint very well.  So I had to put clay over all the cracks. I made a big leaf out of DAS clay for the top and covered the cracks in the base with DAS clay and pressed leaves in It came out ok, but was very time consuming.

So don't use Activa over something.  It shrinks too much.  In a review that I read someone complained that DAS is "rubbery".  I think that is true but have decided that isn't such a bad thing when using a form or armature.

Here are the finished Gnome houses.  I haven't decided whether I want to put a shiny finish on them or not.  Each one is a working jar, by the way.


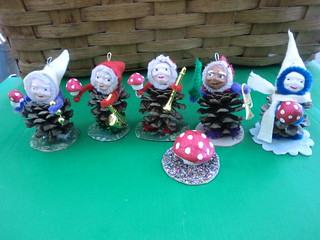
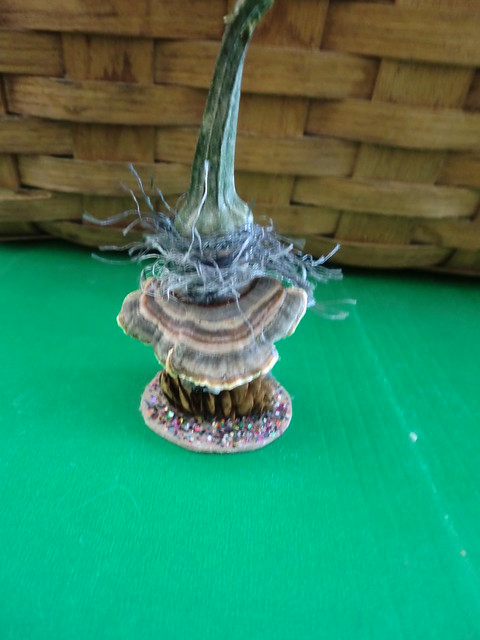
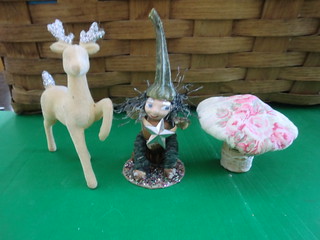
I like the Activa for making small objects.  Here are the mushrooms
 that my foster daughter and I made.  Mine is the red and white one.
I also like the way that Activa takes paint.  DAS is whiter, doesn't shrink much, and takes impressions well.  But it is rubbery and harder to smooth and doesn't take paint as well as the Activa.
Here are some of the things I made still in progress  (Below).  I'm going to make a butterfly with the DAS clay to compare to this one, but that will be my next post. And hopefully I'll have the butterflies both used in projects by then as well.


Bottom line, they both have their uses.  But if I could have only one, I would pick DAS because of the shrinkage issue with Activa.

Thanks for looking.  
Kathy


Wednesday, December 23, 2015

Gingerbread House

Emboldened by my success making a giant gingerbread mushroom and not wanting my new skills to go to waste, I helped my neighbor and her 3 daughters (ages 12,10,8) to make a large gingerbread house.  I designed a four gable house so they would each have a large equal sized piece to decorate.  In their kitchen each of the girls rolled out and designed their front.  We baked them first so they would cool and they could decorate while I rolled out and baked the other pieces.

Here is the Mom and the 8yo's fronts (drying out on a cookie sheet, not baking them like this!):

Jennifer and Samantha's fronts

And here are the 12 yo and 10 yo's fronts:

Madeline and Katherine's fronts

There is just a little bit of side that will show so I practiced my piping on them.  I designed it so the foot print of the house is a cross.

I just did the small sides that showed

And here are two angles of the finished product.  I went over to take pictures last nite because the girls plan to demolish it and eat it on Christmas!

Gingerbread house Dec 2015

G-bread house 2015

And yes those are gummy worms around some of the windows.  An innovation I never imagined.

Thanks for looking and enjoy the holidays!
Kathy

Sunday, December 13, 2015

Gingerbread creation

"Deep in the Forest"   I made this for The Family Place's 13th annual Gingerbread Festival.  There was a peoples' choice vote and I was third place (adult catagory).  The big blue mushroom is about 15 inches or so tall, and the scene is all edible except for the base it sits on.  These photos are the morning before the festival before I transported it over.


I'm totally hooked!  I'm already planning next year's creation.  My friend Linda made the flowers and leaves which we dried on wax paper then I put them where I needed them later.


I got tired of making caps and stems for the smaller mushrroms and thought I'd try forming mushrrom shapes whole and cooking them.  Of course they collapsed as they cooked,  but they turned out to be perfect for the roof mushrooms.   There are little elf faces made out of marshmallows in the windows of the mushroom stem and hiding in the shrubery behind the little house.


I tried too make even the back side pretty, and I put some candy way up high under the cap.


This is the first thing I've ever made from gingerbread and royal icing.  By the time I got to the butterfly, I'd finally gotten good at the icing!  

Ginger bread mushroom 2015


Thanks for looking!


Saturday, February 21, 2015

Vintage Pinecone Elves diy

I know its not Christmas, but I run out of time and don't make Christmas crafts at Christmas!  I love vintage pinecone elves.  Here are some of the ones that I put out at Christmas.  The ones in the bowers were on our Christmas tree when I was a kid (I have 6 total).  The little girl skier was my mother-in-law's.

CIMG3358

Then there are these which are in bad condition but I still like them.   I think it would be nice to have a few dozen more so they could take over the Christmas tree.  A few years ago I gave my brother six in the bowers (like our childhood ones) that I bought on ebay.  Even as I was purchasing them the prices skyrocketed!

CIMG3360

So I've been saving supplies for years to make my own.  I would want to make them anyway, but the high prices of the "real thing" is another incentive.   Many people have made very nice modern versions.  BUT I love the faces on my vintage ones and want more like them.

CIMG3359

Love that face!  Some vintage ones have mean faces.  I prefer this face.
A couple weeks ago, I mentioned to a friend that I had all the supplies and have been wanting to make them for years.  She asked me to show her craft circle how and offered to come and help me figure it out a few days before.  So I was forced to do it!  The day before she came, I made some faces from sculpy and gathered all the materials together.  Unfortunately I didn't take pictures of what my friends made at the group.  I shared my supplies, including faces and sculpy mushrooms.

So here are the ones I made which are like the traditional ones...

CIMG3361

And a close up:

CIMG3361

And here is my favorite one that I made.  There is only one because I had only one dried squash top and one dried shelf mushroom.  I am going to make more next fall after I gather more tops and shrooms.  He is sitting on a pinecone like the vintage ones in the bowers.  I will ponder if I want to make some similar but in bowers.

CIMG3363

View from back, you can see his mushroom cape and that he sits on a pinecone.  Body is an acorn.

CIMG3364

Here he is with a vintage reindeer and a mushroom that I made a a while ago.

CIMG3365

Thanks for looking!

I'm linking up to Vintage Inspiration Party at Beyond the Picket Fence, The Sunday Showcase by Stephanie Lynn, Block Party at Keeping it Simple Crafts, ShareYour Creativity Link Party at Its Overflowing and Lets Talk Vintage at Bella Rosa Antiques.  Be sure to check out the other fab projects!

Kathy


Friday, October 31, 2014

Allow Americans to pay ransom to terrorists?!!!!

I know this is a craft blog but I'm so upset at what Scott Brown, who is running for US senator in New Hampshire said last night in the debate with Senator Shaheen that I have to comment everywhere in my (admittedly rather small) realm.  If we start paying terrorists ransom money, Americans will be snapped up everywhere for money.  Think of the danger that this puts our troops in and possibly even tourists.  Scott Brown either you are so deep into the Republican mission to say that nothing President Obama does is correct that you will say anything in opposition without thinking or you are truly an idiot.  Either way you do not belong in the US Senate.

Wednesday, April 2, 2014

Head vase

I wanted to learn to make faces out of broken dishes.  I learned a lot while making these faces.  Next, on to planters.  I love the ones where the plants look like the hair.  Good sized face pots typically cost over $100!  So I'm hoping to get my technique down and make some of those next.

This is a small vase with 2 flatish sides that I picked up at a yard sale.  I had the weldbond glue and the grout and the dishes.  If this was for outdoors I would have attached the dish shards with either silicone or thinset which is what I will do when I make the pots.

My first face, needs stronger lips:

CIMG3207

I like this one better, but find it a little scarey.

CIMG3203

Thanks for looking.  Check out a LOT of fabulous ideas at Whatever Goes Wednesday at Someday Crafts., Weekly Link Party 7 at Just Between Friends,  Under $100 Link Party at Beyond the Picket Fence! and the Share Your Creativity Party 109 at Its Overflowing .
Kathy

Monday, February 17, 2014

Mosaic Stand, not yet grouted.

I started this almost 3 years ago and got stuck and put it aside because I was unhappy with parts of it.  And the back ground was very hard because I should have marked guide lines on the pot but didn't.  In the last week I tackled the problems and made some changes and finished the picky tiles in lines background.   It was definitely a learning experience, and will continue to be when I grout it in the spring as I am determined to use 4 or 5 different grout colors (outside!).

The whole thing is still sitting on a lazy susan, and the plate on top is not attached but I probably will use it so.

I was inspired by a beautiful luna moth that stayed for a full day on a telphone pole outside our house.

CIMG3186
CIMG3187
CIMG3188
CIMG3189
The green moth and the birch tree are the "fronts", the sides are a little boring.  I will probably paint the terra cotta top and bottom edges, not sure what color yet.

And it will go on one of my porches as a little chair side table or plant stand.

Thanks for looking.

I'm linking up to Stephanie Lynn's Sunday Showcase at Under The Table and Dreaming and The Weekly Link Party #2 at Just Between Friends.  Check out the other great projects there!

Kathy


Friday, September 6, 2013

Office Chair Makeover

We bought our foster daughter this chair 20 years ago from a used office furniture warehouse.  She was into rose colors at the time.  20 years later it is very beat up and the picture doesn't really show how awful.  The almond colored plastic base is all yellowed and cracked and gross.

CIMG3115

Its been in my study looking terrible.  I want some practice with reupholstering before I tackle big projects so I decided to remake this chair on Labor Day afternoon.  My rule was that I couldn't buy anything but had to use what I have on hand.  (I have too much stuff, gotta use it up!)

So I took it apart and spray painted the plastic and metal pieces.

The back of the back rest really does pop off!

Lots of screws to remove everywhere else.
I decided to to use a brown-bronzy textured paint on the plastic base and metal piece that connects the back of the chair to the seat; and brown spray paint on the plastic piece on the back of the back rest (what do you call those things).

I painted the plastic parts with rust-oleum for Plastic spray paint in dark green first, hoping that would help the bronzy stuff stick since it is technically for metal.

CIMG3116

I realized too late I didn't need to waste any of the bronzy paint on that big plastic piece from under the seat because it doesn't show.  Oh well.

Here is the plastic back of the back piece in progress.

CIMG3117

The dark brown was almost empty and it is water based.  We'll see how it goes over time.

While the paint was drying I stapled fabric onto the seat and back piece.  Hint: use long staples in your staple gun.  I had to hammer then in sometimes too.  I also wish I'd taken a few pictures before I took the chair apart because I got a few staples out of the area covered by the back cover.  They tend to blend in with the fabric fortunately.  And the corners are not perfect partly because the fabric is totally not stretchy.

I used some upholstery fabric that I had bought a couple years ago for a different project then changed my mind.

Putting it back together was a bit of a challenge.  Again pictures or even a note or two would have helped, but I did it with Iggy's help!

CIMG3118

I'm happy with it.   What do you think?  Here is the before and after together for comparison.

KAP's Photos

I'm linking up to Whatever Goes Wednesday at Someday Crafts. Also Thrifty Things Friday at The Thrifty Groove.   Check out the other great projects there!

On the next thing!

Kathy

Saturday, July 20, 2013

Three dress to skirt refashions, 1 failure, 2 okay

I got two almost identical XL dresses in India print at a TS for a couple of bucks each, thinking they would fit my foster daughter.  They did fit but were not flattering.  So I decided to try to make something for me.  I only took a before pic of this one, but there is also a red print which is the second refashion in the post.

Dress plus pants

Another sewist who posted at the Refashion Coop had added a skirt to a pants waistband and top so I thought I would try that with the top of these old linen pants which have never fit me well.

Dress plus pants

So I cut the skirt off the dress at the gathers and attached it to the pants top.  

Dress plus pants

Then....  disappointment!  What was I thinking.  I have no idea what to do with these now.  About all I can say for this skirt is that it fits.  Too much pant part and too much gathers, I think.  The trouble is the pockets of the pants go low.  I may try to redo this (later, much later).

Dress plus pants

Ok the red dress is next.  I had seen a cute skirt in Anthro with a similar print and a dropped waist.  So this time I cut the skirt off above the gathers, just below the armholes to leave room for a casing and have the gathers drop to the hips.

Refashion dress

And put some nicer buttons (that I got at the same TS, later) to replace the plastic wood look standard cheapo ones that the dress came with.  There weren't enough of one style so I used two cute small ones at the top and the larger ones you see for the rest.

Refashion Dress

Turned under to make a waistband and put elastic in elastic.  I sewed up the button up front, tho I kept the look of it.   I think its ok.  Not sure I like how I styled it in this photo, but you get the idea.

Refashion dress

I wish I had made it a bit longer.  Still could I guess!

Finally, I found a wild colorful too large print dress at a TS.  It was a sleeveless pull on.   I cut it off under the arms, took in the sides (with my new serger - love it so much),  saved some fabric when I took in the sides at the bottoms for the side vents.

Measuring the side vent

I like it, and its a nice length.

Long skirt made from dress

So I'm not really thrilled with even the 2nd two which I have worn and will wear again.  Even so, one of the wonderful things about refashioning is that I am improving my sewing skills and trying styles without spending much money.

I'm linking up to Motivate Me Monday at Keeping It Simple and What to Do Weekends at Crafts a la Mode. and Refashion First Friday.  Check out the amazing other projects!

Thanks for looking.

Kathy